Dragonhold Crafting Guide
Turn Azarkeen materials into reliable gear between lucky drops — station by station.
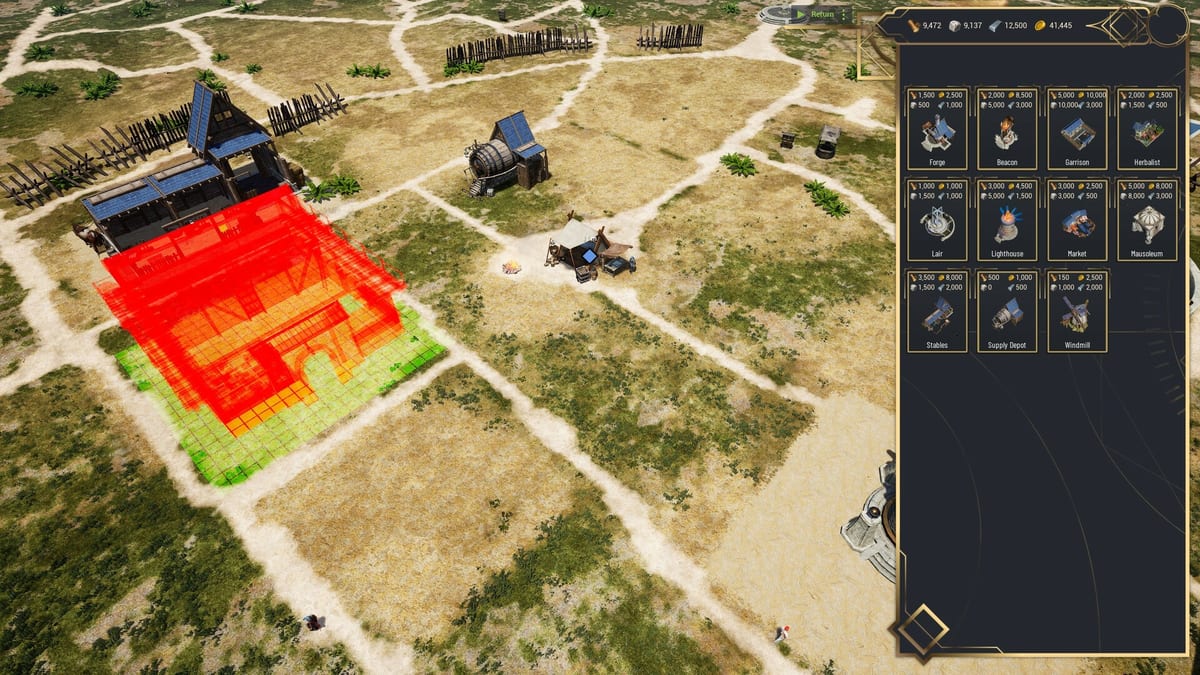
Crafting in Dragonhold bridges the gap between random extraction loot and deliberate build progress. Exis Games ties crafting stations to castle town construction — you cannot craft endgame recipes on day one because the hub itself is a visual tech tree. Materials looted from Azarkeen mean nothing until the corresponding building exists on your island. This guide explains how to plan station unlocks, which materials to hoard, and when crafted gear beats world drops during Steam Early Access.
Pair this page with Crafting Stations for hub placement logic and Loot Guide for what to extract when bags fill mid-mission.
How crafting fits the extraction loop
The loop is always: depart from hub → fight and loot in Azarkeen → extract → spend at hub → depart again. Crafting sits entirely in the spend phase but must inform the loot phase. Before each run, ask which recipe or building tier you are one material short on — then target missions or zones that bias those drops per Expedition Zones.
Hand of Fate modifiers may buff material drops or spawn enemies with niche salvage. A run that looks “low loot” for gear might still be perfect for crafting farming if Fate favors resources.
Station unlock order (Early Access mindset)
Exact recipe names shift in patches, but priority logic stays stable:
- Basic weapon or armor bench — Stabilize combat when RNG refuses upgrades. Crafting blues you can rely on beats chasing purple sidegrades.
- Consumable or utility station — Potions, traps, or mission tools that reduce wipe risk during solo learning.
- Advanced forge or enchanter — Mid-game power spikes tied to Anchor Stone progression from How to Rebuild the Castle.
- Specialized relic or dragon gear station — Late priority when base rider stats are solved and dragon upgrades from Dragon Upgrades need support.
Never unlock advanced stations before you can afford recurring material costs — empty high-tier benches waste Anchor progression time.
Material types and storage habits
Materials generally fall into:
- Common scrap — Holy-war metal, beast parts, camp salvage. Bulk-heavy; extract often instead of hoarding infinite stacks.
- Zone-specific reagents — Tied to biomes or enemy factions in Azarkeen. Farm deliberately when a recipe highlights them.
- Rare catalysts — Boss or elite drops used in high-tier recipes. Treat like mini-relics: extract immediately after acquisition.
- Castle construction resources — Shared between town buildings and some crafting upgrades. Coordinate with Castle hub plans so you do not starve building placement for one weapon craft.
Deposit mats after every successful extraction. Death rules vary by mission type — never assume materials are safe until hub loading completes.
Recipes vs world drops
Crafted gear shines when:
- You need a specific stat spread (resistance stacking, stamina regen) rare drops refuse to provide.
- You are gearing alts or co-op roles with predictable baselines.
- Patch notes rebalance drop tables but leave recipe costs stable temporarily.
World drops shine when:
- Fate modifiers buff chest quality on a given night.
- Bosses guarantee slot upgrades you cannot craft yet.
- Relics from Relics outclass crafted placeholders.
Most riders hybridize: craft stabilizers, chase relics and boss pieces for spikes.
Solo crafting pace
Solo players should craft one reliable upgrade per successful extract night rather than gambling multiple rerolls. Resource efficiency matters without teammates feeding mats. Use How to Play Solo pacing — shorter, safer runs that feed a single recipe beat marathon greed sessions that starve crafting queues.
Co-op crafting coordination
Parties benefit from role-based crafting splits: one rider farms reagents, another chases boss catalysts, a third handles castle construction mats. Align in voice before splitting zones on the map. Co-op Guide covers comms; this page supplies the material targets.
Crafting mistakes to avoid
- Unlocking stations without reading building prerequisites on the hub island.
- Crafting sidegrades while underleveled for mission tier — stats cap effectiveness.
- Selling mats that become critical two Anchor Stones later.
- Ignoring dragon gear crafting if aerial damage is your primary clear tool.
- Rerolling recipes endlessly during Early Access rebalance weeks — check Updates first.
Post-craft verification
After crafting:
- Test in a lower-pressure mission before pushing high Director tiers.
- Update personal Gear Priority notes.
- Adjust next run’s loot targets for remaining recipe gaps.
Crafting makes Dragonhold feel less RNG-dependent. Combined with smart extraction from Extract Checklist, your hub becomes a workshop that expects supplies — not a museum of almost-enough mats.
Frequently Asked Questions
Quick answers tied to this page.
When do I unlock my first crafting station?
After placing the required town building on your hub island. See Crafting Stations and Getting Started.
Should I craft gear or wait for drops?
Craft stabilizing upgrades when drops fail your build; chase boss and relic pieces for spikes. Loot Guide covers hybrid strategies.
Do crafting materials survive failed extractions?
Treat materials as unsafe until you extract to hub. Rules vary by mission — prioritize extraction after rare catalyst pickups.