Dragonhold Expedition Zones in Azarkeen
Mission area types, loot biases, and tactical routes — pick the right zone for your build goal tonight.
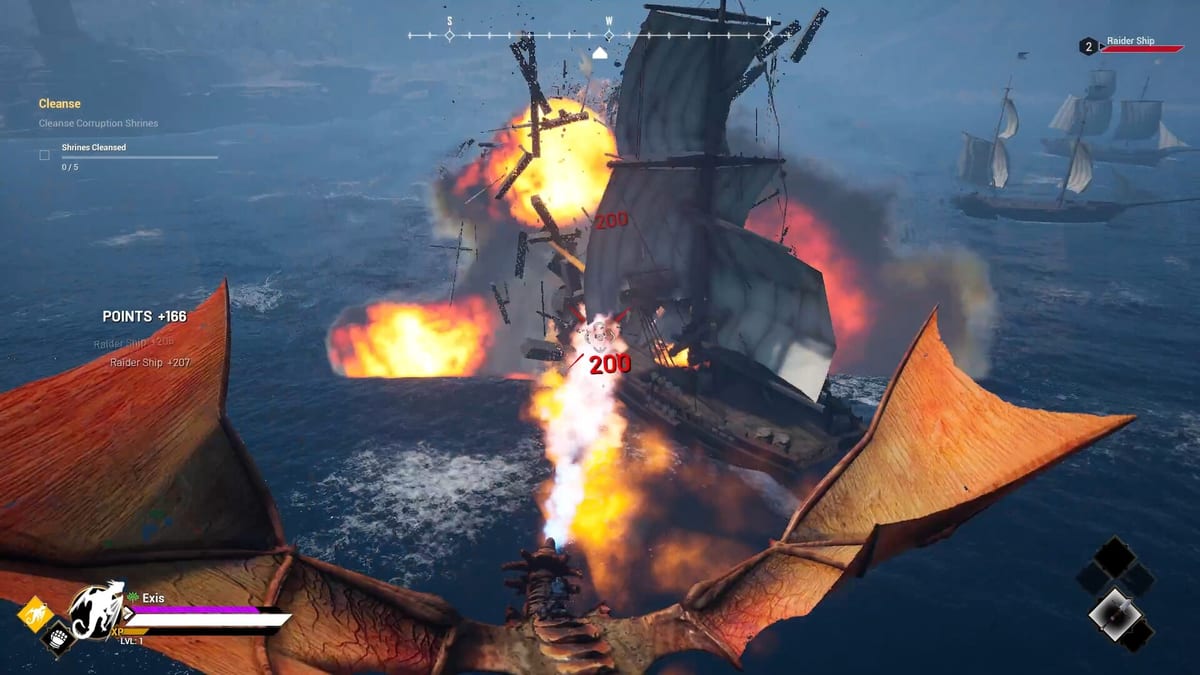
Azarkeen missions slice the war-torn region into expedition zones with distinct layouts, enemy mixes, and loot biases. Dragonhold players who treat every mission as identical quickly lose gear to the wrong fights — camp raids favor quick aerial clears, ruin interiors punish weak ground builds, and boss pockets demand coordinated mount/dismount pivots. This guide categorizes zone archetypes so you pick missions matching tonight’s goal: gear upgrades, crafting mats, relic chase, Anchor progression, or co-op practice.
Cross-link Azarkeen Overview for regional context and Loot Guide for extract priorities inside each zone type.
Zone archetype overview
Overworld stampede lanes
Open lanes with roaming packs, stampeding creatures (community names like gobbler herds appear in developer combat blogs), and ridge roads suited to dragon breath strafing. Director events love spawning extra packs here when parties linger.
Best for: Fast material shreds, warm-up flights, co-op air/ground split practice.
Watch for: Ground players stranded without aerial cover; stamina burn from endless strafing.
Loot bias: Common crafting scrap, consumables, occasional elite gear.
Fortified camps and siege lines
Walled camps with archers, siege engines, and mixed melee. Requires dismount to clear interiors or capture objectives.
Best for: Balanced gear upgrades, holy-war themed mats, mid-tier mission progression.
Watch for: Reinforcement waves when alarms trigger; extract paths blocked by reopened gates.
Loot bias: Weapons, armor, camp salvage tied to Crafting recipes.
Ruin interiors and dungeon pockets
Tight third-person spaces where flight is limited. Elite density spikes and relic chests often hide here.
Best for: Relic chase from Relics, build tests for Ground Combat.
Watch for: Party splits without comms; inventory sorting in uncleared rooms.
Loot bias: Relics, high-tier gear sidegrades, rare catalysts.
Boss arenas and world-class encounters
Dedicated spaces for major bosses with aerial and ground phases. See How to Beat Bosses.
Best for: Guaranteed upgrade slots, Anchor-linked mission rewards, co-op milestone nights.
Watch for: Overextending after boss death when Director adds cleanup waves.
Loot bias: Boss-tier gear, relic slots, mission completion items.
Escort and civilian rescue spaces
Missions freeing Azarkeen civilians or breaking siege lines — pacing often mixes overworld travel with grounded defense moments.
Best for: Narrative progression, mixed-loot runs when you want variety.
Watch for: Split attention between objective timers and loot greed.
Loot bias: Balanced tables with quest items plus standard mats.
Picking zones for build goals
| Goal | Zone type to favor |
|---|---|
| First reliable armor | Fortified camps |
| Crafting bulk mats | Overworld lanes + camps |
| Relic chase | Ruin interiors + bosses |
| Anchor Stone progress | Mainline boss/quest missions |
| Co-op training | Camps with clear air/ground roles |
Align with Gear Priority so you do not farm ruins while missing baseline stats.
Routing and extract planning
Before engaging:
- Aerial scout — Mark extract beacon, cliff approach, and elite clusters.
- Ground entry plan — Who dismounts first in co-op; solo players note escape lanes.
- Abort line — Where you extract if Fate modifiers spike mid-zone.
Extract Checklist codifies abort signals; zone routing makes them actionable.
Hand of Fate zone interactions
Fate cards can infest zones with undead, reduce visibility, buff loot, or spawn “insane” difficulty spikes per Exis Games’ Hand of Fate description. The same camp zone plays differently night to night — do not assume yesterday’s safe route stays safe.
Co-op zone tactics
- Air rider — Clears overworld packs, watches extract timer, calls Director spawns.
- Ground rider — Handles interiors, chests, revives.
- Flex rider — Swaps based on zone archetype — essential in ruin-heavy missions.
Details in Co-op Guide.
Solo zone pacing
Solo players should under-tier zone difficulty until extract habits solidify. Overworld lanes teach Fate reading; ruin interiors come after ground gear is stable from Getting Started.
Early Access zone drift
New expedition spaces and Director tweaks land via Steam patches. When Updates mention new biomes or spawn tables, revisit this page and adjust farm routes — community maps lag official changes.
Expedition zones are Dragonhold’s menu of risk. Order the right mission, execute the right route, extract with the right loot — repeat until Azarkeen feels like a catalog you shop intentionally, not a roulette you survive accidentally.
Frequently Asked Questions
Quick answers tied to this page.
Which expedition zone is best for beginners?
Start with simpler camp or overworld missions from Getting Started before ruin interiors and bosses.
Do all zones share the same loot table?
No. Camps, ruins, and bosses bias different drops. See Loot Guide for priorities.
How do co-op roles change by zone?
Ruin-heavy zones need stronger ground players; open lanes favor aerial clears. Co-op Guide covers splits.